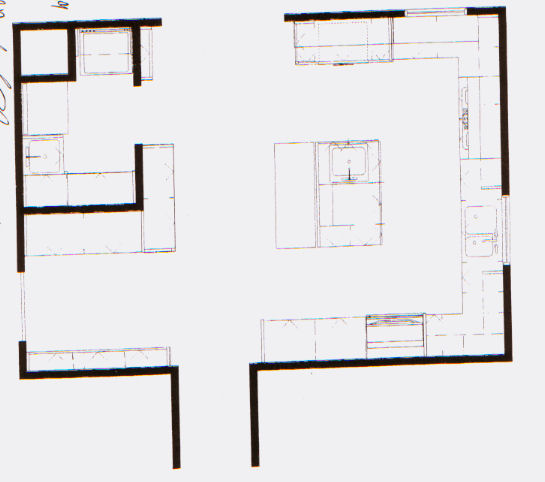
Below is the basic layout of the new kitchen, as well as working elevations using standard fixtures that do not completely represent what will be installed. These are the cabinet maker's drawings, and do show the cabinets more or less as they will appear. They will also give a general sense of layout, if not appearance.
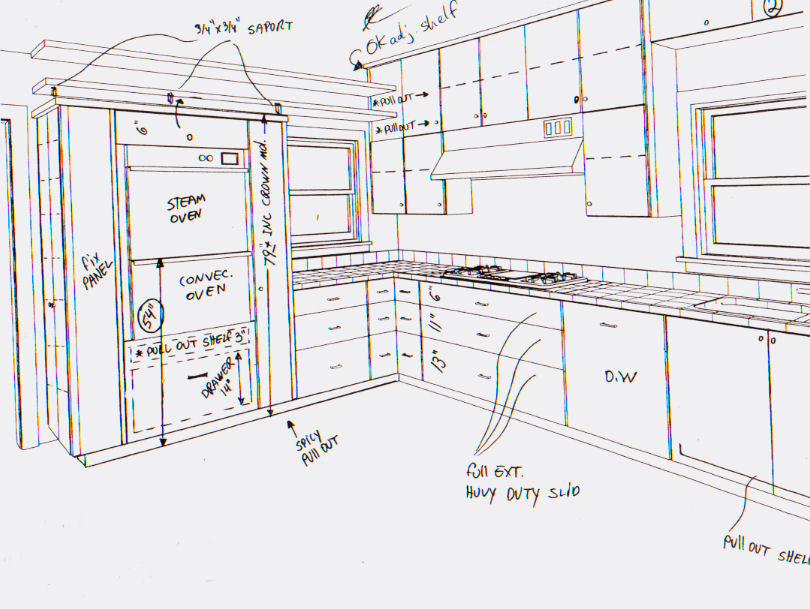
Below is the Southeast corner. Features are the open shelves over the ovens, the large drawer under the ovens with the interior pullout, and the pullout under the sink. Also, there's a a tall pullout rack for spices, etc., to the right of the oven, which will have a solid back on the oven side. The two handles showing on either side of the corners are part of a stack of single diagonal corner drawers. The upper cabinets are a little higher, the hood is also bigger. The cooktop is two pieces, gas and induction, and the windows come down to counter level. The window over the sink is a garden window with side casements and a grid face. The window by the ovens is a double slider.
This next picture shows a sketch of the spice cabinet in the front, and the large drawer with shallow pullout under the warming drawer. It also shows the bridge cabinet over the sink. There are two lights shining down on the sink from there, and a grille in front for the heater.
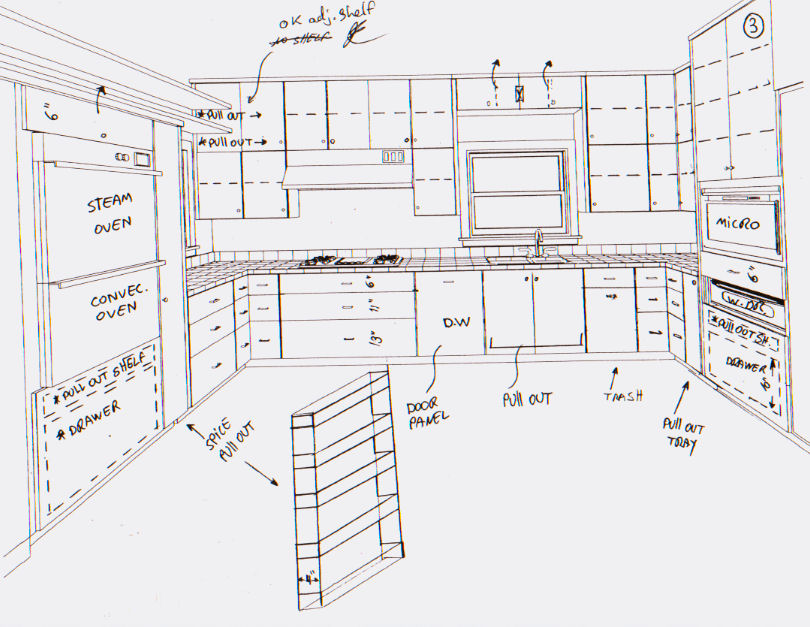
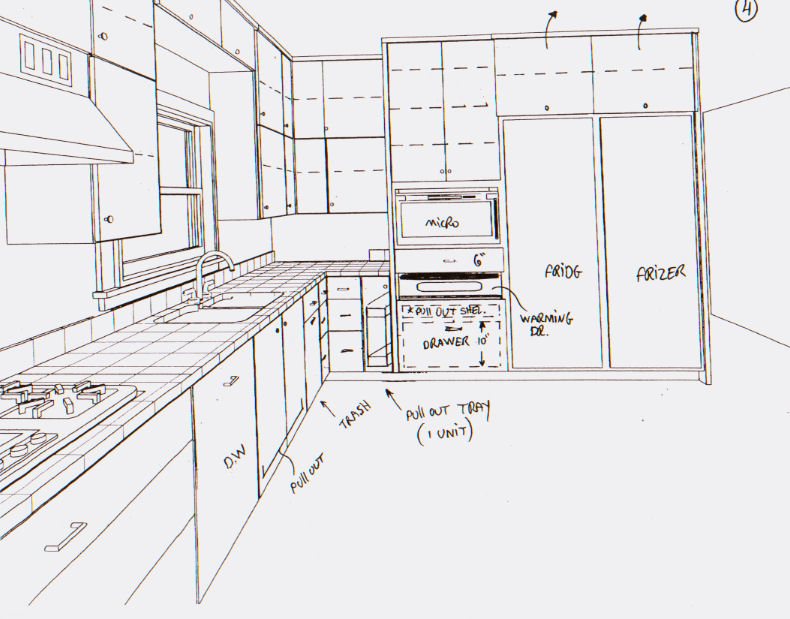
The Southwest corner shows below. Next to the fridge is the Advantium (microwave cum convection oven) over a shallow drawer for its bits, over the warming drawer, over the deep storage drawer. Between these and the corner drawers, below the counter, is a pullout with two trays for Cereal, etc. The cabinets over the fridge and freezer have doors which open up and stay up with very fancy hinges.
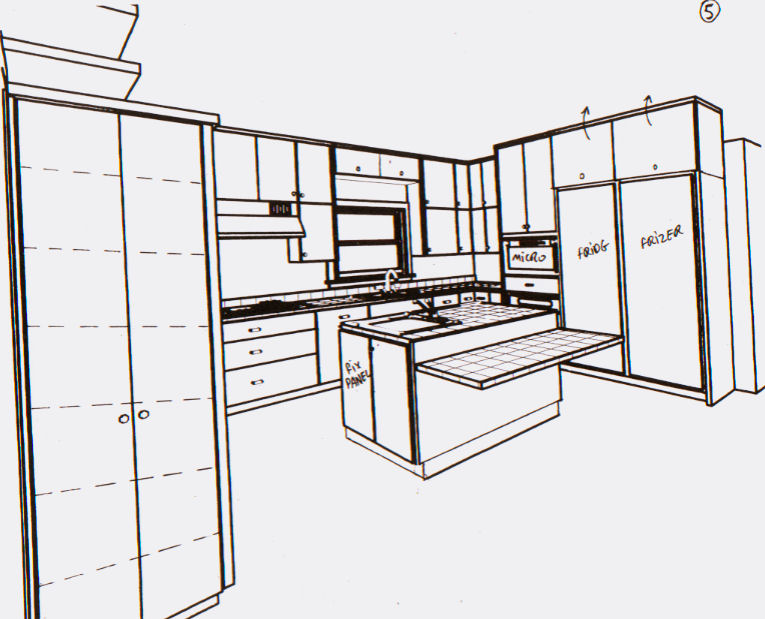
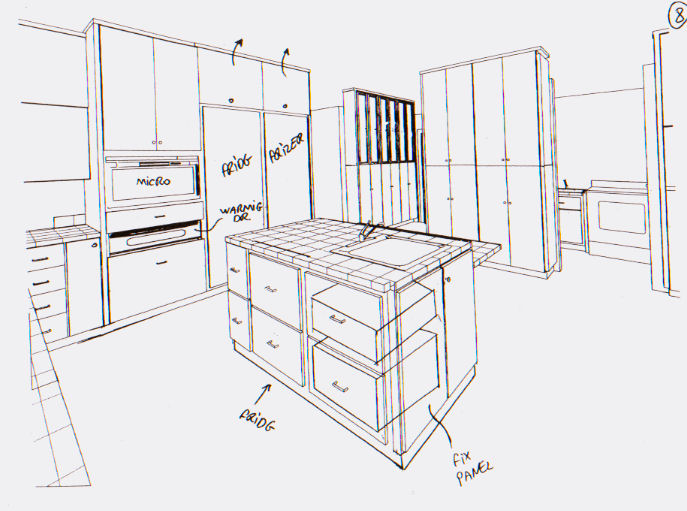
If you're coming in the sliding door you'll see this view. The lower level of the island is a folding table. There will be hinged angle brackets to hold it up, or fold it against the back of the island. The worktop will be soapstone, which will overhang the table by 6". Between the two surfaces will be outlets for electricity, telephone, and cable TV. The cupboard on the left is for vases and pitchers and the like, and also houses the water shutoff for the steam oven and the main switch for the outdoor light (there will be a button on the surface of the wall by the door.
As you come in from the entry hall and look toward the working area of the kitchen you'll see the view below. The foreground sketch is of the dividers for the baking board cabinet. It runs behind the drawers and fridge drawers, and will roll out on special wheels. This is for the oversized, heavy, boards that usually go wanting a home and will be sturdy enough for a marble slab. The arrows above the ovens show where there will be little legs supporting the bottom shelf. The top shelf will ahve brackets.
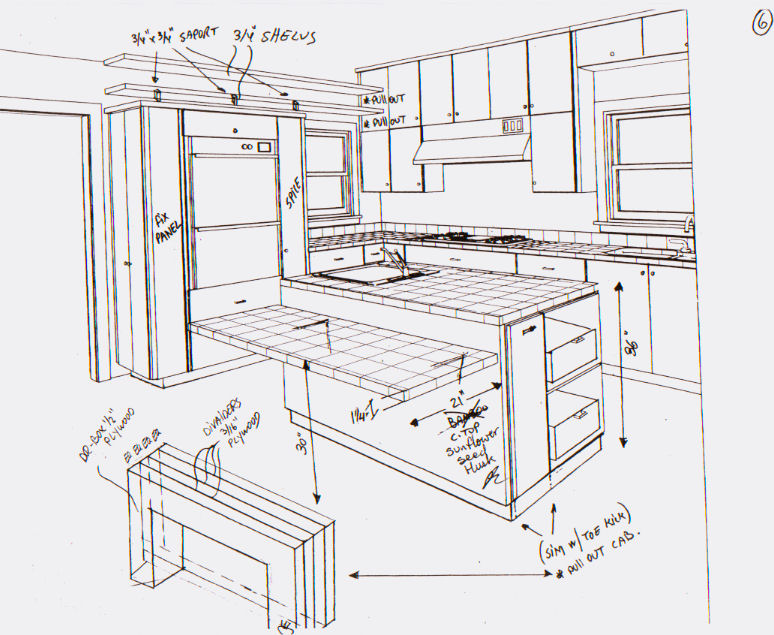
This, below, is the working view of the island. The sink is a trough (6" wide), which starts on the right and runs to the back of the island, where it widens to a 16" bowl. The top drawer under the sink has a full front, but that covers the underside of the sink, and is actually a normal depth drawer. The one under it is deep. The center drawers are refrigerated. The left hand drawers interleave with the drawers around the corner, as can be seen from the drawer boxes drawn. There are only two drawer faces on each side. See above for a description of the pullout.
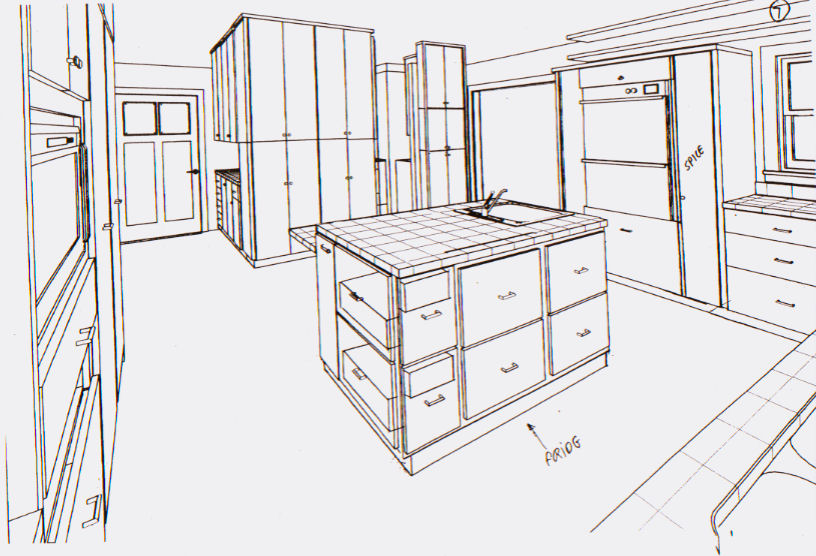
In the below picture, you can see the interior boxes of the right side drawers. Around the corner is a fixed panel on the side of the drawers, and a door behind for access to the plumbing under the sink.
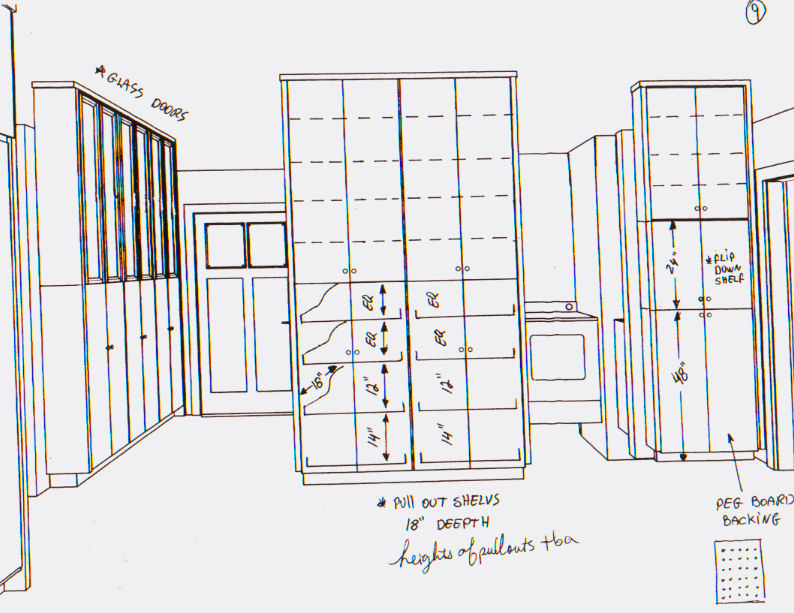
In the center, below, is the main pantry. The lower cupboards have pullouts. The uppers have adjustable shelves. We will determine the exact heights of the pullouts on site after the boxes are installed. To the left are the stemware cabinets in the butler's pantry. To the right are the open door to the laundry room (though that's the washer showing, not a dryer) and to the far right is a 5" deep cabinet. This shallow cabinet has pegboard in the back for hanging things like skewers. The center portion is a small message center, which is mostly for hiding the telephone in when I don't wnat it on the table. It will have a small fold down shelf for writing on, a phone jack and a plug. I'm thinking of backing it with steel for magnets.
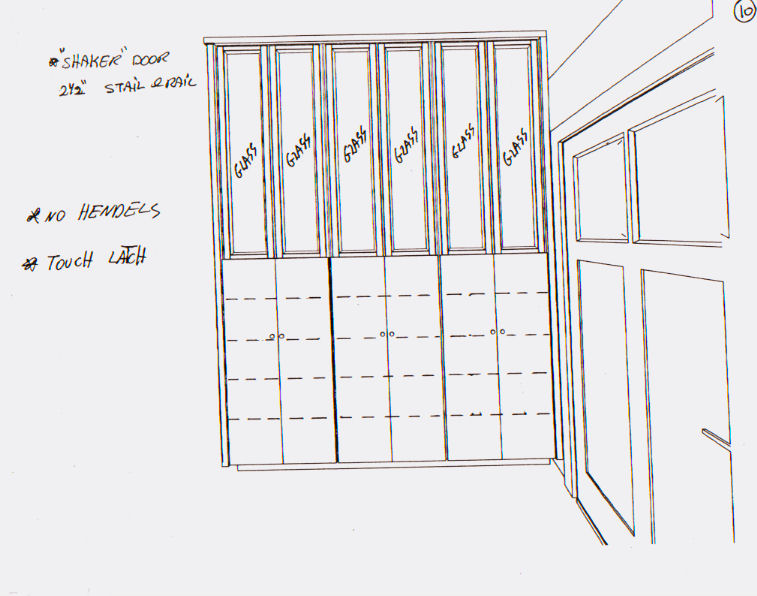
These are the stemware cabinets. They're not really "shaker" doors. That's just a way of saying that the glass is framed with cabinet material. These cabinets are 6-7" deep, and are for stemware, glasses, mugs, etc. That's a representation of the door to the dining room on the right.
Below is the counter in the butler's pantry. Above are adjustable shelves though there's a soffit in there somewhere for the plumbing exhaust. The fixed panels on the right are the sides of the pantry. Below are divided storage, horizontal and vertical, for trays, platters, placemats, and anything else flat and hard to store. The shelf above the vertical platters is for doilies.

The laundry room sink, unlike in the below picture, won't have a cabinet base. Instead it will sit on a custom built stand of a superior variety to the kind that is sold to go with it. The cabinets will have adjustable shelves, and on the shelves in the blind corner will be pullouts (an idea adapted from Arlosmom on Garden Web).
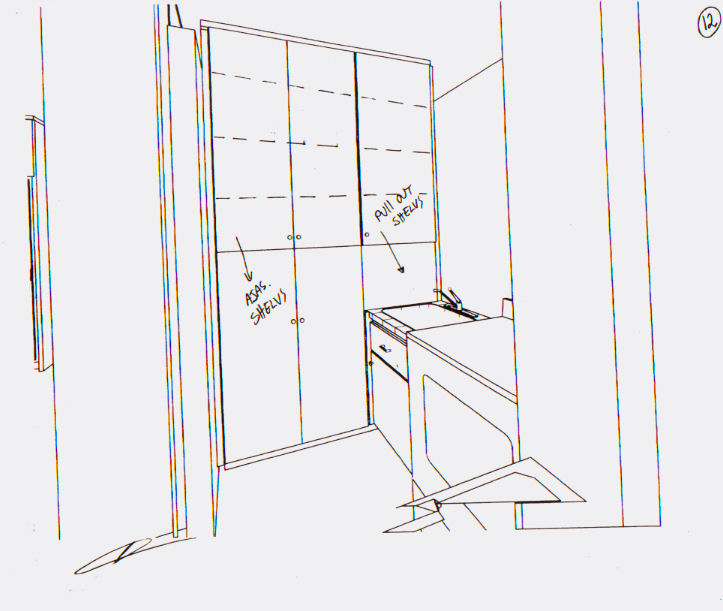
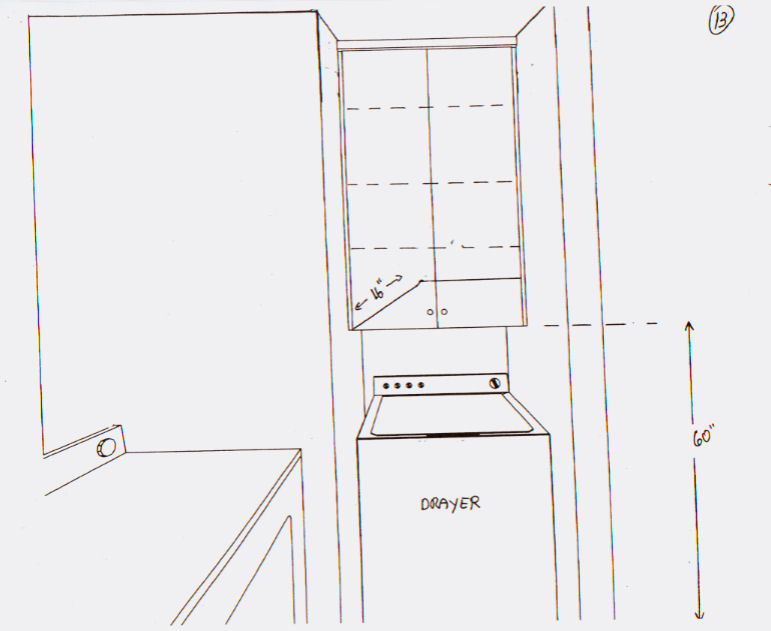
This cabinet over the dryer is for actual laundry supplies. I can stop keeping them on top of the dryer!